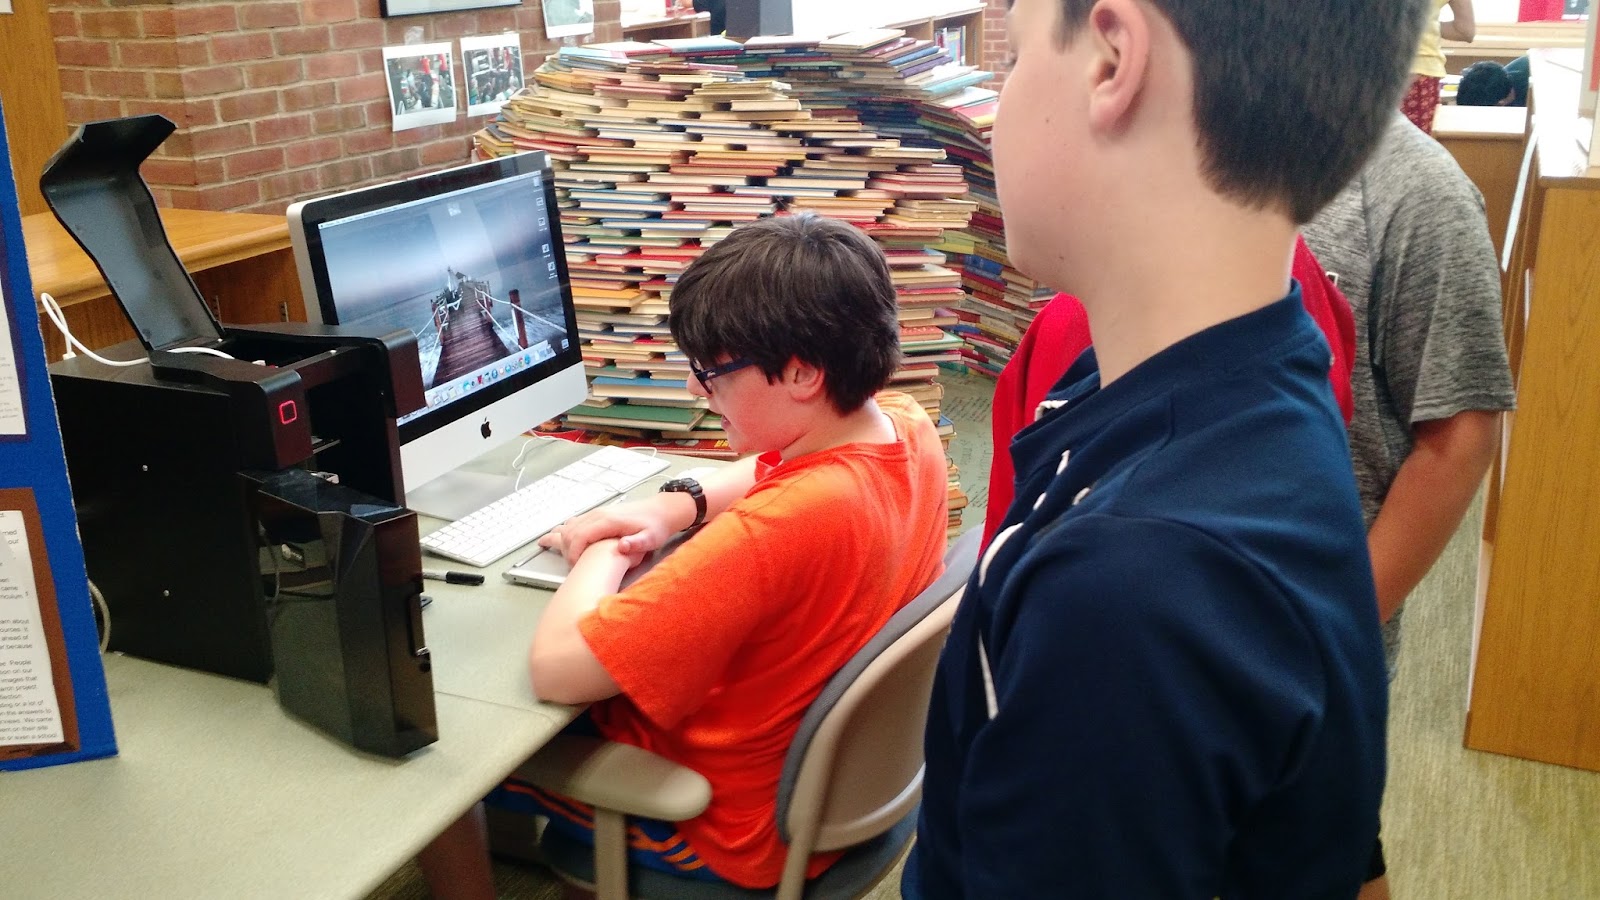
Here is our finished book igloo! Our Stop motion video is posted below. I'm really proud of how the students at Quaker Ridge rallied to build the platform, prototype the igloo, and eventually put it together. We've dedicated the igloo to Robyn Lane, our principal, who has retired after leading us for ten years. It will be a favorite book nook in our library for years to come! You can read more about the process here.
Showing posts with label Maker Space. Show all posts
Saturday, June 27, 2015
The Finished Book Igloo
Here is our finished book igloo! Our Stop motion video is posted below. I'm really proud of how the students at Quaker Ridge rallied to build the platform, prototype the igloo, and eventually put it together. We've dedicated the igloo to Robyn Lane, our principal, who has retired after leading us for ten years. It will be a favorite book nook in our library for years to come! You can read more about the process here.
Saturday, June 20, 2015
The Up! Mini 3D Printer Prints Well, Has Lousy Documentation
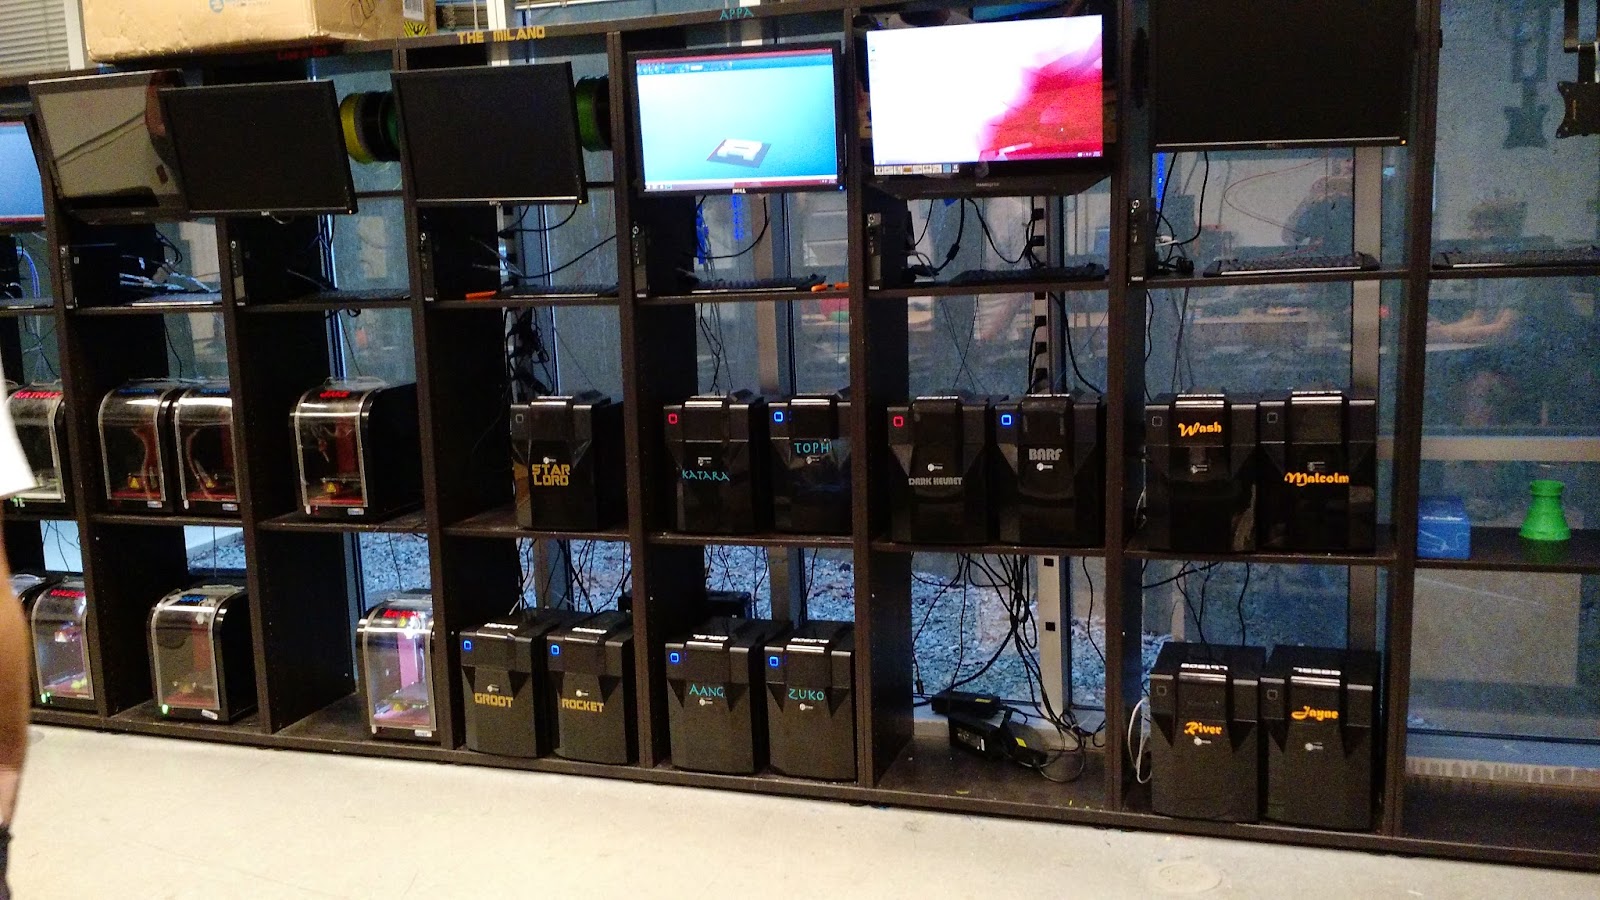
| The 3D printer farm at Georgia Tech's Invention Studio |
I learned about the Up! 3D printer at the Georgia Tech Invention Studio, where it was the printer of choice in their printer farm. If you are ever in Atlanta, I recommend calling the Studio and asking for a tour; it’s an inspiring space run by even more inspiring students. The University Lab Instructors were really positive about the Up! and we decided to give it a shot. We got ours a few days ago and this is my first reaction to the printer.
Set Up
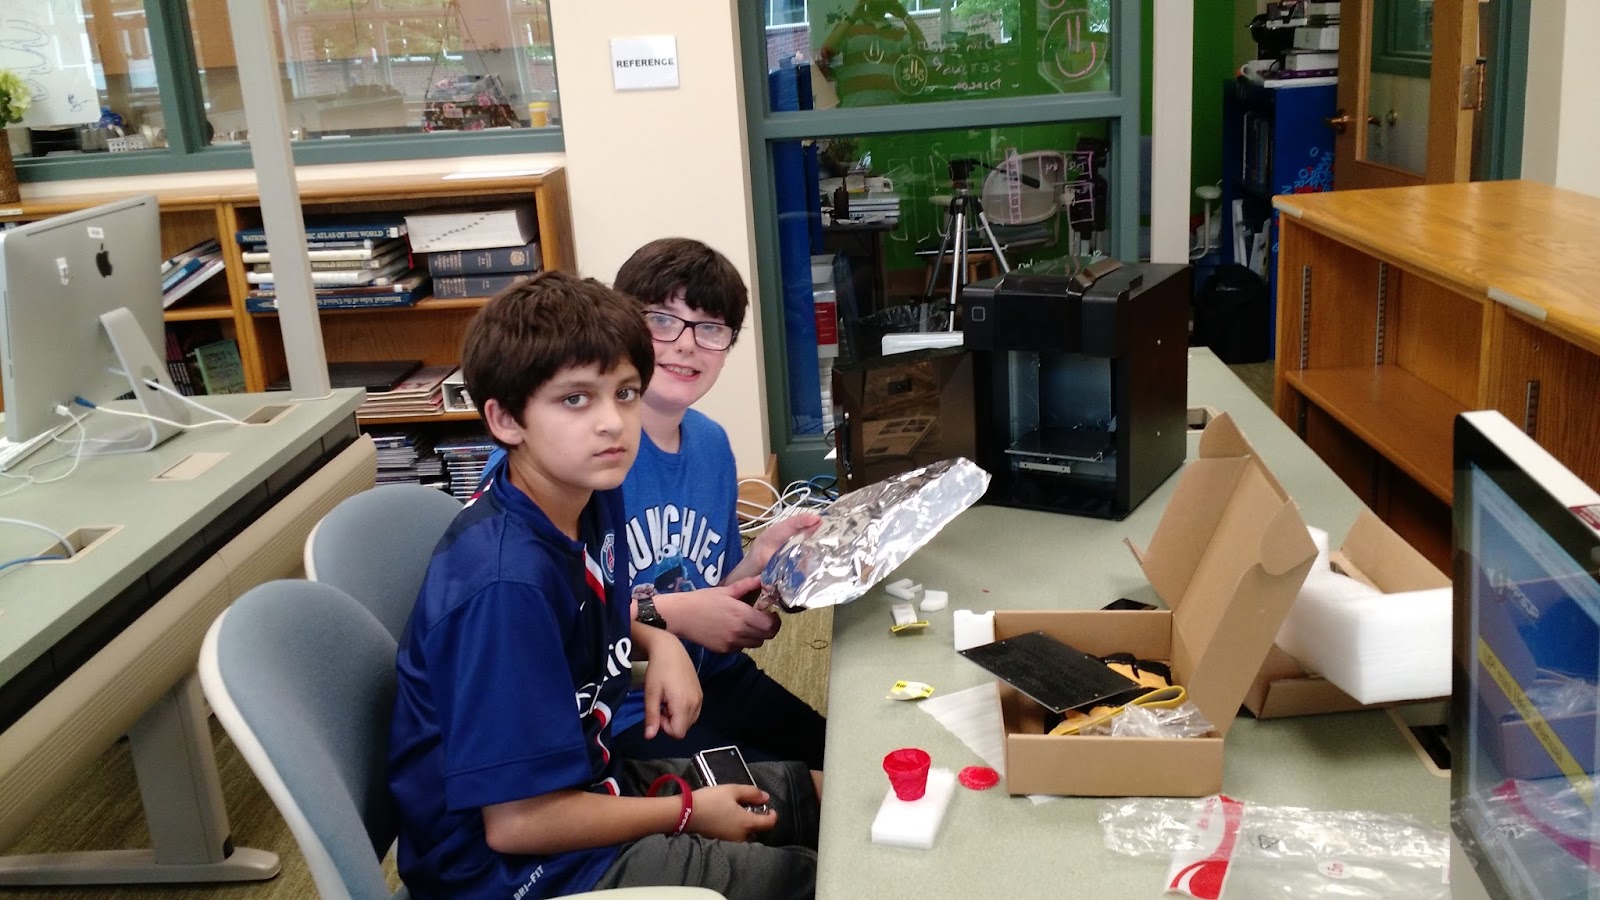
| Students unboxing the Up! printer |
The Up! comes nearly set up, which is welcome. A test print is waiting for you on the printing plate indicating that the printer had gone through some quality assurance before being shipped. Unfortunately, the quick start manual that comes with the box is really lackluster. It seems to have been poorly translated (TierTime Technology is a Chinese company) and there’s quite a bit that you have to figure out for yourself. Thankfully, the two students who were in charge of the set up are swift. I highly recommend going to the Up! support page to download the full manual straight away. Interestingly, the quick start manual does not mention the existence of the online manual or the need to download the software from the website. Once downloaded, the software installed easily on our iMac, but I’ve heard people have had problems on PCs.
The First Print
Feeding the filament into the extruder is simply done, I’d say it’s easier than our MakerBot. The extruder heats up quickly and starts to push out ABS filament in the same color of the test print that was on the plate. You initialize the printer by holding done the power button, causing some loud beeps to indicate the process is underway. It's so loud, in fact, that I flinched in our library, casting guilty glances at our librarian who was in the middle of a lesson. Calibrating the nozzle has been more difficult than it needed to be. The steep learning curve is a direct result of the lousy documentation. The quick start guide provides no direction and the manual doesn’t help much either. It is recommended to calibrate the nozzle 2mm from the plate but a visual reference would go a long way. If the nozzle is too far from the plate the model will not adhere well to the perforated plate. This will cause edge curling and the ultimate print failure on larger jobs. Through much trial and error, I’ve found that the nozzle has to be really tight to the plate - just a little more than the thickness of paper.
The plate is supposed to heat to help the model adhere. This is a great idea but it seems like the mechanism is not powerful enough to do this adequately. It often requires long preheat times (up to an hour) and even then it’s lacking. Users familiar with the printer often replace the stock heat switch with a more powerful one. I don’t want to wait an hour to print and I’m not sure that I want to upgrade the switch either. For now, I’ve found that Cube Glue works great to keep the models on the plate while printing.
Accessories
The Up! comes with a great set of tools to remove and clean finished prints. I really appreciated the quality gloves, scraper and exacto knife. Up! also provides Allen Keys and Nozzle Wrenches to help you repair or modify the printer. This sends the right message: take control of this printer - fix it, improve it, take it apart and put it back together again. I especially appreciate the downloadable spare parts library allowing users to print their own replacement parts.
Quality
The Up! does a nice job with it’s prints, producing smooth models with decent detail. The print area is on the small side, at 4.7 inches cubed. I like that the printer can use both ABS and PLA filament. Mechanically speaking, the printer is great. The nozzle seems to be maintenance free so far and the extruder heats quickly. The filament feeds easily. The plate heater is disappointing but at least there is a solution.
Conclusion
The Up! 3D printer is a good deal at $600 but there are some things to consider. Model curl and print failure can easily happen if you don’t have the nozzle calibrated correctly, which has a steep learning curve because of the documentation. You should also heat the plate or use 3D glue to keep the print from curling. If you don’t want to deal with the calibration you might want to look at the Up! Plus 2 because it levels and calibrates automatically. The Plus 2 costs twice as much at $1299.
Monday, June 8, 2015
Building a Book Igloo
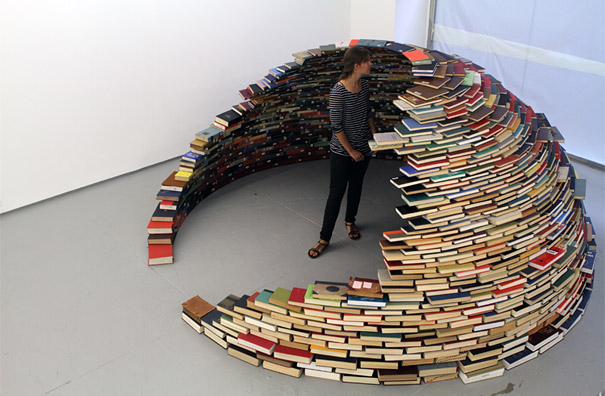
| Miler Lagos' work "Home" and our inspiration |
Our school’s library was in need of book weeding. There were encyclopedias that were twenty years old, books that hadn’t been checked out in thirty years, and some that were just plain falling apart. In fact, there were hundreds of books like this and it just didn’t seem right to throw them out. It all became clear after our school librarian, Kate Byrnes, discovered this installation by Colombian artist Miler Lagos. This what we needed to do. We needed to mobilize our Young Maker’s club and build a book igloo.
| Book Igloo prototype |
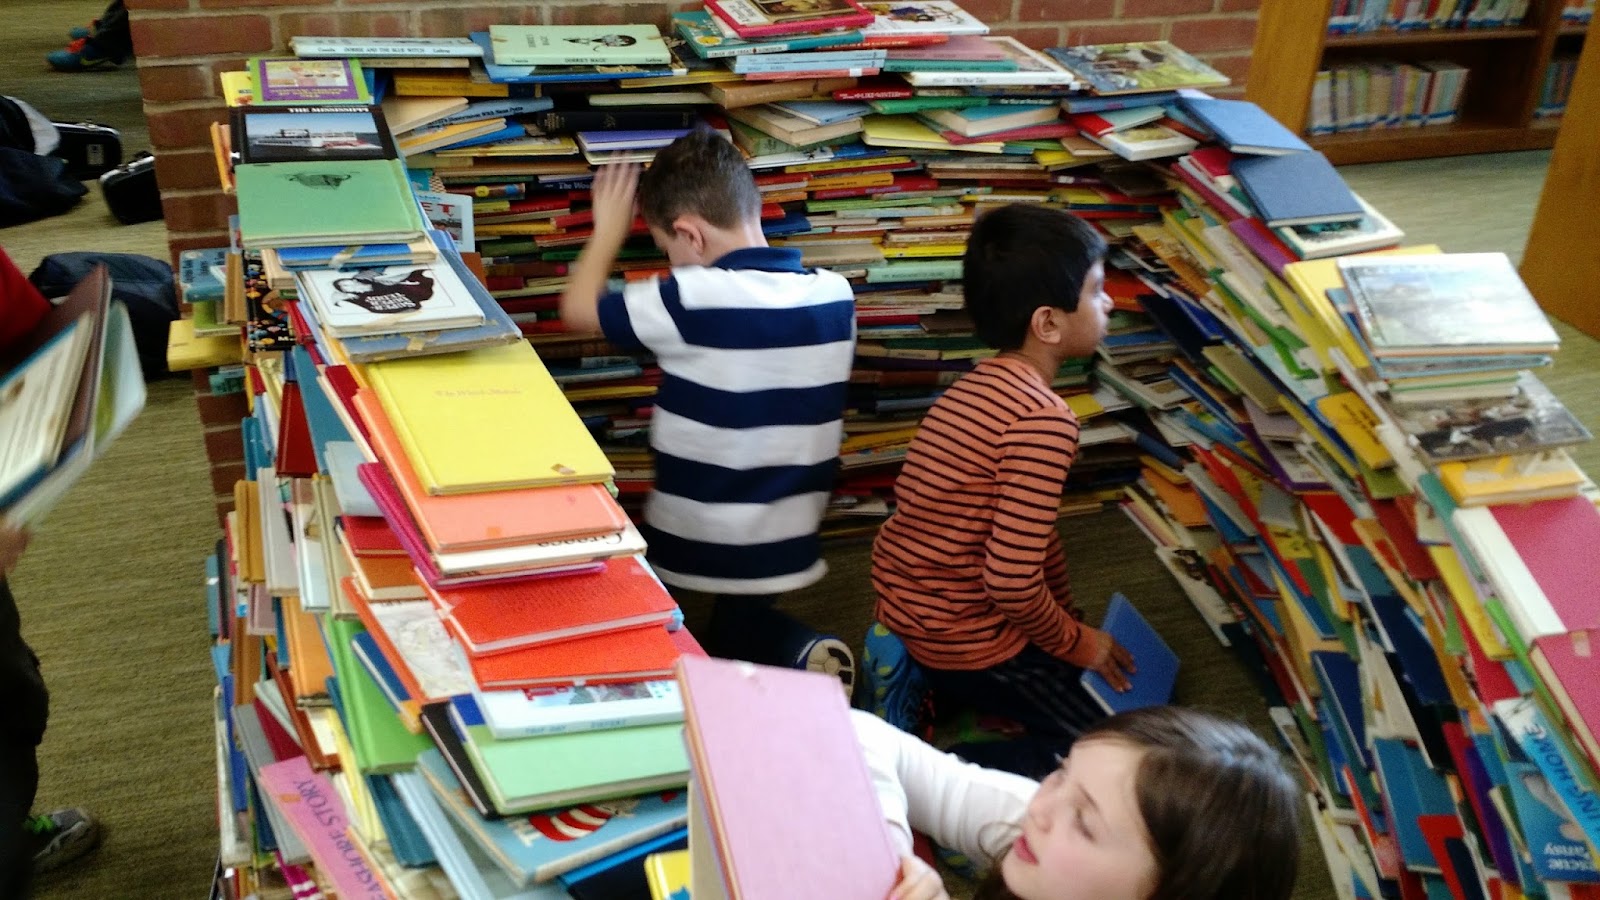
Having never built such an igloo before, it was important to build a prototype. The Makers Club adeptly stacked books over the course of two afternoons (informed by lots of Minecraft practice) until the igloo began to show signs of structural failure. They did a great job and the prototyping process was really informative. When we started we focused on the width and length of the books. Our test made it clear that it was the thickness that was truly important: each row needed to be built with similarly thick books.
| Maker Club building the igloo platform |
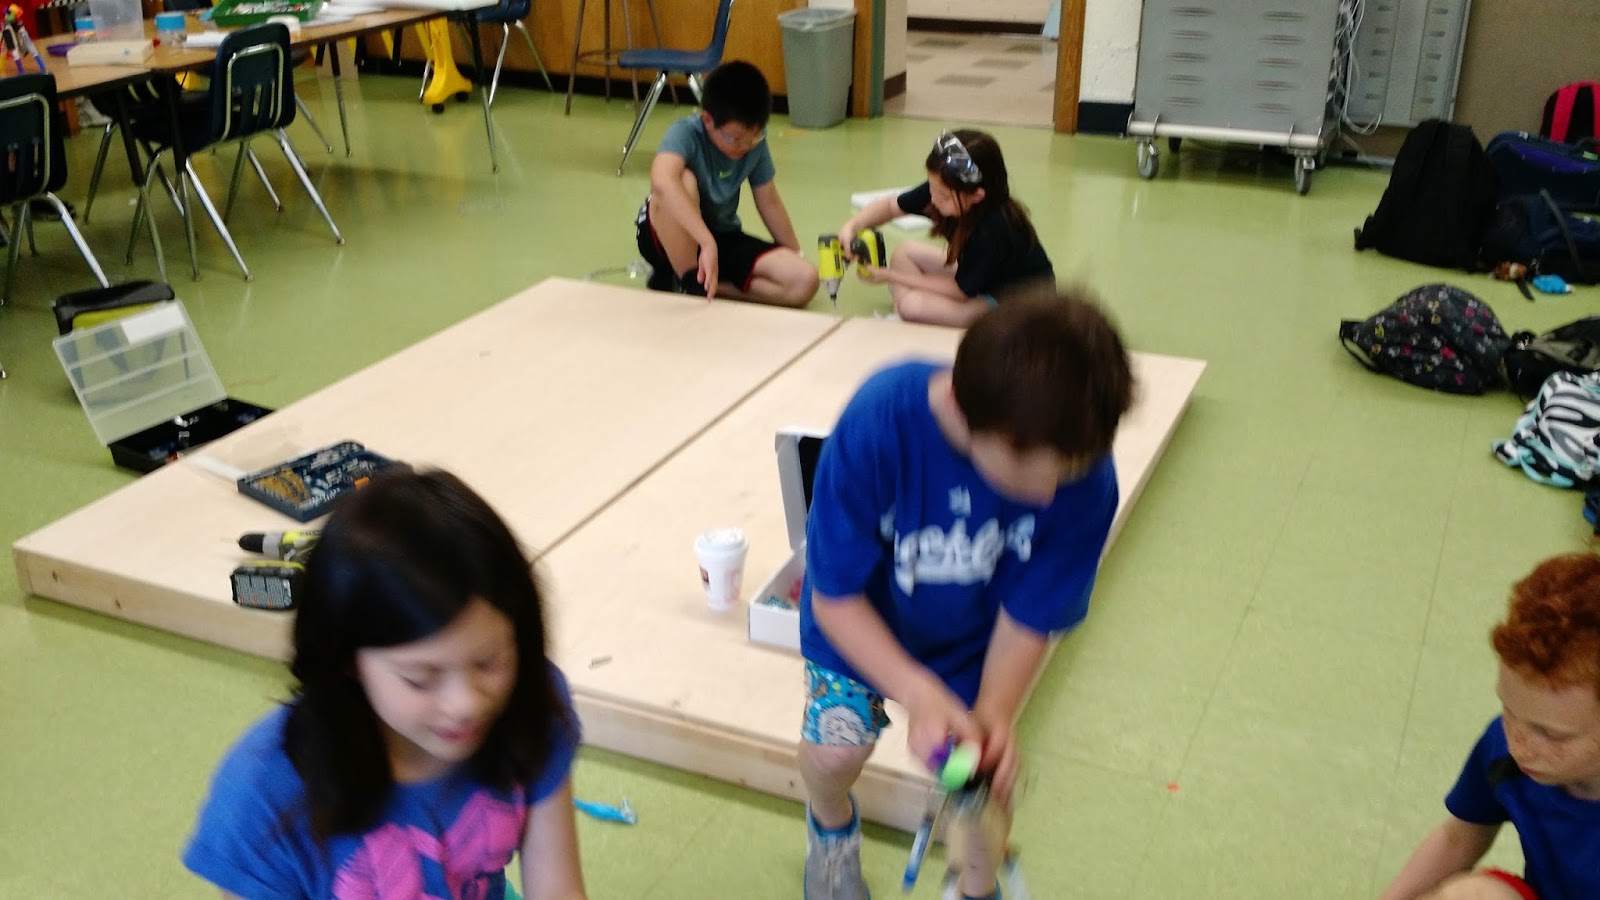
Then the kids helped me build a platform for the igloo. We want the igloo to be movable in order to keep the library space flexible and for more practical reasons, like cleaning the rug. I was especially proud of one of our middle school helpers who figured out how to build a brace for the casters.
| Students answering the question, "What does reading mean to me?" |
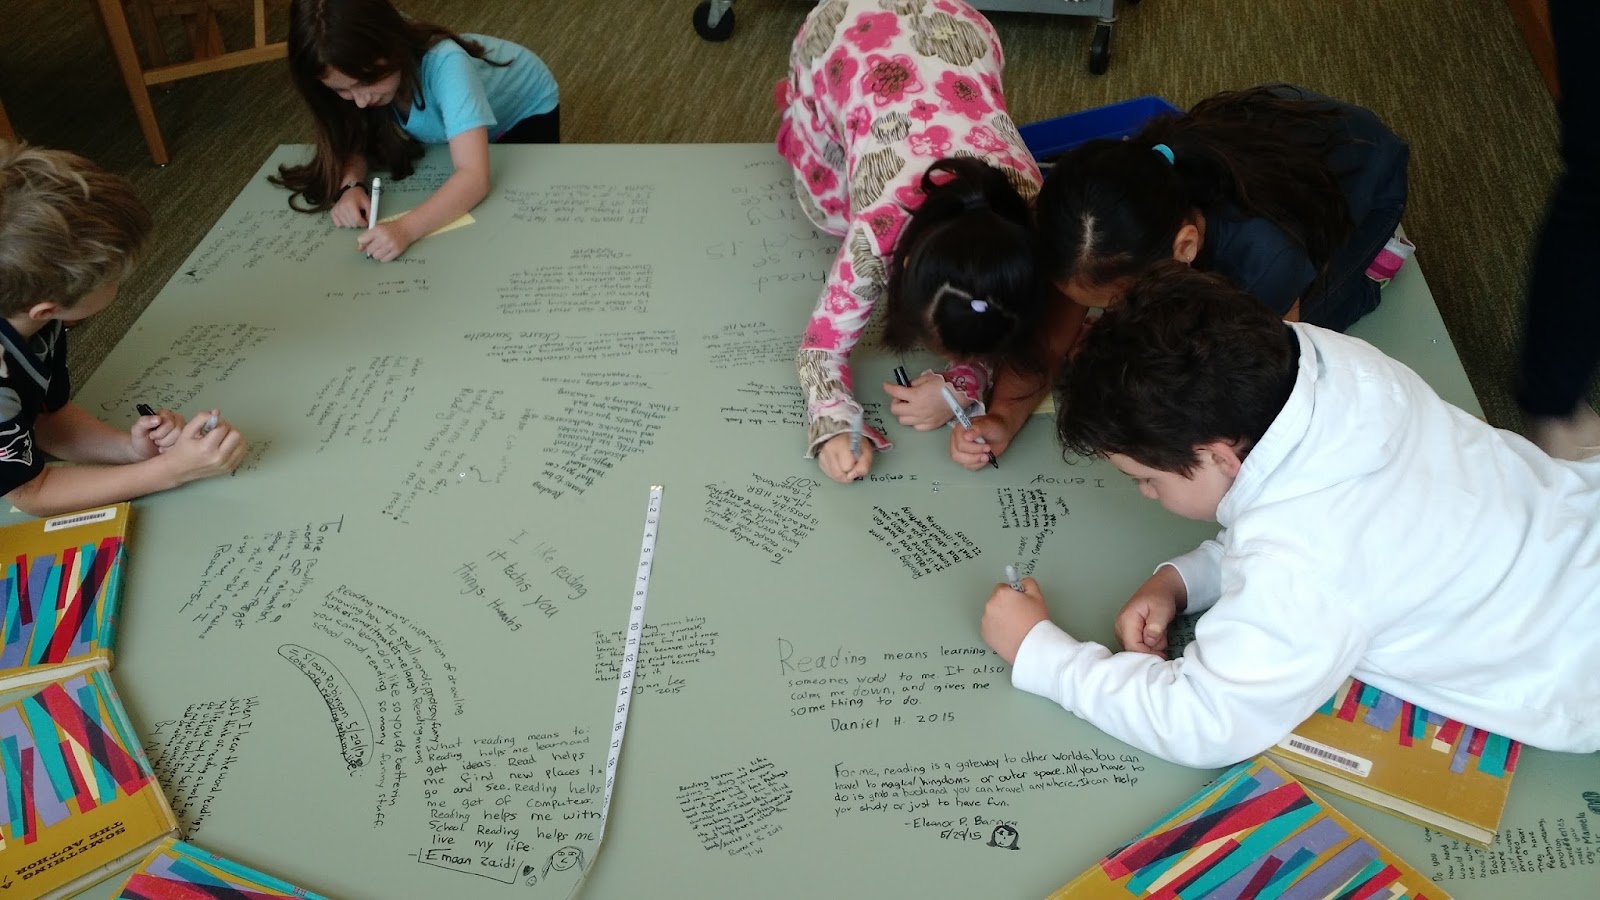
Once the platform was ready we had students use sharpie markers to answer the question “What does reading mean to me?” Their answers are amazing and they add a warmth and personal feeling to the project. Our book igloo is becoming an art installation like Miler Lagos’ work. Unlike Lagos’ igloo, ours will be permanent. Each book will be glued into place by construction adhesive creating a book nook where students can enjoy reading. The igloo will be a centerpiece of the library next year and I’m looking forward to blogging about the finished project as soon as it’s done.
Tuesday, January 27, 2015
Lessons Learned Through Art Bots
I’ve realized something funny about myself while on the #makered journey. Normally, I’m a huge proponent of project based learning. I try to incorporate story lines and plan for open ended solutions. But I fell back on recipes when I started working with kids in the Makerspace last year. You know what I mean; everything comes with recipes - Legos, Snap Circuits, even Instructables. A recipe gives students an outcome and then provides the steps to make the outcome happen. Although efficient, recipes rob students of creativity and the trial and error process that is so important to making enduring connections. This year I have been working hard to avoid the “recipe crutch” and the results have been much more rewarding.
Take the simple art bot, for example. Last year I scoured the Internet for different takes on the vibrating drawing robot and found one that looked simple and effective. I created a demonstration bot to use as a model and carefully planned how to explain the needed circuit. The project went off without a hitch and each student created a reasonable facsimile of my art bot. Looking back, the project fell well short of what it could have been.
To be fair, I was just starting things off last year and had no materials to pull from. I hadn’t read Make Space and we didn’t have our T Walls yet. I hadn’t taken Lisa Yokana’s design thinking course and I wasn’t using the d.school’s design process as a framework. It’s important to respect the beginning of something. In the last year I have had many inspirations to move my teaching and the art bot project is different as a result.
As with each project this year, students started at the T walls - planning their designs together. Then, students went “shopping” at the material wall to get what they needed to build their prototypes. The material wall would be revisited over and over again throughout the project as designs were modified. This is the first bit of advice I would give to a teacher trying to set up a Makerspace: before you get the fancy and expensive hardware, get lots of inexpensive materials (popsicle sticks, foam shapes, paper clips, beads of different sizes and shapes - get as much as you can) and organize them in easy to open containers. Then display these materials in an open and accessible way. Don’t hide them behind a cabinet. With my material wall as a resource, I could introduce the idea of an artbot, discuss the circuit using the motor and battery, and challenge the students to come up with a novel design that would accomplish the task. The results were amazing. Students came up with incredibly creative solutions, some of which were far better than the recipe I had used last year.
I learned a few lessons through the Art Bot project. I needed to let go of the recipes and trust the design process. I needed to have inexpensive materials available for student prototyping. I needed to let the kids find their own path to the solution. In the end, the project was easier for me, involved much more critical thinking for the students, and was significantly more meaningful for everyone.
Sunday, November 23, 2014
Redefining the Bird House, Part 2
The second grade students learned more than I expected in our "Redefining the Birdhouse" challenge. Beyond making cool birdhouses, they might be able to help Congress...
Mrs. Cheung’s second grade students had spent several days brainstorming their redesigned bird habitats and now it was time to start making. These students are familiar with using materials like Legos to build - but this project was different. They needed to realize a three dimensional birdhouse from 2 sheets of 18 inch square cardboard. We wanted to ease the class into three-dimensional thinking and how better to do that than with Minecraft?
Three-dimensional thinking
Building in three dimensions from two dimensional sheet material isn’t intuitive - we imagined confused stares and the chorus of, “What do we do now?” We started by printing out Minecraft blocks from PixelPaperCraft.com using card stock. Cutting, folding, and gluing a 3-D cube is challenging but the children were able to persevere because, well, Minecraft is cool. We modeled cutting and folding the paper and had a sample cube available (without adhesive) so that students could see how it turns out. Although students used glue sticks to hold the cube together, I’d recommend having some scotch tape on hand, you’ll thank me later. It took a cognitive leap for the class to turn the paper into a cube, and I’m glad we started that way.
Planning
Cube building was an important step to prime our students for three dimensional thinking. Once primed, students reconvened into teams to plan how to change their cardboard sheets into 3-D bird houses. The children used small whiteboards and dry erase markers to sketch out where they should cut and fold the cardboard. Whiteboards have a playful, impermanent feel and the teams planned with enthusiasm. Teams needed to take turns planning on the small whiteboard and negotiate the direction for the birdhouse.
Building
It became clear that inter-group communication was valuable once students started building. Students used scissors, safety cutters (I highly recommend these for any elementary maker space!), and duct tape to construct their houses. Glue guns and the drill press (for bird house doors!) were available with teacher support. Each group was doing something interesting, but in isolation from the other cool things that were happening in other groups. We needed to reinforce that the teams were not in competition with one another, and could, in fact, help other teams. We needed to regularly stop the work and discuss what was going well and what wasn’t. Students were more self-assured after each discussion. Where teams needed to practice working together during the planning phase, now they needed to work together as a class. It was strangely foreign!
What I’d do differently next time
Next time I do this project I will try to build a better scaffold for empathy from the bird’s perspective. It is difficult for a seven year old to think from the perspective of another person, much less a bird. The kids did a great job but I think it could have been even better. I think it’s great that they figured out how to make furniture, I’m just not sure it fits into the design challenge. I’d also push harder on inter-team collaboration. I cannot stress enough how valuable it was to have the teams share with one another. Our students are used to competing with one another, both individually and in teams. It took a shift to think of the design challenge as a common goal that we could work on together to solve.
Why I think Congress should try design thinking
We live during a polarized time where people are more likely to talk over one another than to one another. The design thinking process encourages students to put themselves into someone else's shoes when they problem solve. The process enables teams to work together towards a common goal, rather than against each other. Lately it seems that the skills of negotiation, collaboration, and perspective sharing are rarely practiced. I'm encouraged that this generation could buck the trend.
Thursday, November 6, 2014
Redefining the Bird House
Recently I met with one of our second grade teachers, +Jennifer Cheung, to redesign a performance task for a unit on animal habitats. We were inspired by the birdhouse project mentioned in the SparkTruck movie and decided to expand it for her class (You can see our learning plan below.) It's been an interesting project so far. Next week we begin the "Prototype" phase and our student teams will build their proposed birdhouses out of cardboard. I can’t wait to see what what they come up with.
The addition of the second T-Wall in our Maker Space made it possible to have a full class ideating at the same time. Jen's class used the space several times to brainstorm their bird habitats and I couldn't be happier about how it worked. The T-Walls really contribute to collaborative brainstorming and make ideation sing. But the best part of the maker space is not the T-Wall; it’s the design thinking process developed by the Stanford d.school. The stuff in the space is useful, but it’s the process that’s changing pedagogy.
Here's how we broke the process down:
Empathize (Done in the Classroom and at home)
“How do the birds in our area interact with their habitat?”
Observe the birds outside of the classroom and at home. What types of birds do you see? What are the birds doing?
Define (Done in the Classroom)
“What does a bird need to be comfortable in a habitat?”
What do the birds need to do what they are doing? Do these birds need special things?
Ideate (Done in the Maker Space)
“How might we build a comfortable habitat for these birds?”
Use “T-Walls” to brainstorm in teams. Don’t yet explain the constraints of the project so as not to discourage “moonshot” thinking. Have teams talk through their ideas. At the end, engage in “Considered Selection.” Each team member gets a graphic organizer with three columns: "Most Practical," "Most Exciting," and "Most Unusual." Team members write one choice for each category on the organizer. This becomes a way to vote as a team.
Prototype (Done in the Maker Space)
This is where the teams discover that there are constraints to the project. Each team gets a square of cardboard (1.5 feet by 1.5 feet?), string, and duct tape to make the bird house. Teams will have safety cardboard cutters, hole punchers, and scissors. Teachers will help with a hot glue gun, and string. In fact - I’m thinking about getting Flex Seal to coat them. (As seen on TV!)
Test
The Birdhouses are hung on the tree and the class will observes how the birds interact with them during the year. If time allows, Perhaps students will redesign the houses after several months of observation for fidelity to the design thinking process.
Sunday, October 5, 2014
The D.School's T-Wall: Flexible Collaborative Spaces
Last summer I spent a lot of time trying to rethink our school’s Maker Space. One of my biggest influences was “Make Space” by the Stanford d.school. “Make Space” showcases flexible design and creative environments that adapt to the needs of the people working in them. One project that resonated with me was the “T-Wall,” a freestanding structure with two intersecting 6’ X 4’ walls clad in dry-erase board and mounted on casters.
I had thought about getting whiteboard paint to surface the workbenches, or maybe the cabinet doors, but it’s expensive and seems difficult to apply. A T-Wall, on the other hand, can be moved around the room and acts as a great divider for group work. What’s better, the whiteboard material is just Gloss White Hardboard which is a great deal at 14 bucks a sheet. I used the d.school’s plans and after buying lumber, quality casters, and fasteners, the T Wall cost me just under $120. Not too bad for a piece of moveable classroom furniture with 5 large spaces for dry erase collaboration! Even so - I think I can make these cheaper with experience.
This has been a crazy September, but I’ve still used the T-Wall a few times. It was fantastic in a staff meeting where teachers could form groups based on learning style, discuss a problem, and write or draw freely within their nook. It was just as good with students brainstorming ideas for the Maker Space. The kids naturally engaged in conversations about their ideas when confronted with the common surface of the “wall.” Then, they took a museum walk to read each other’s ideas.
It was successful enough to make a second T-Wall. This time I am going to deviate from the d.school’s specifications. The original plan calls for two 6’ by 4’ walls. Unfortunately, this makes it difficult to move through a standard doorway. I had to assemble it inside the room. Also, the T-Wall stands at an imposing 6ft 4in after adding casters. This is tall enough to collide with the SMART Board arm at the end of the classroom - an accident waiting to happen. The next build will be a called the “Little T”, one that’s a foot shorter and six inches narrower.
Wednesday, April 23, 2014
Building an Elementary Maker Space
My colleague Peter McKenna started a Maker Space in his elementary school though our district’s unique and wonderful Innovation Grant process. His successes inspired a local movement to build spaces in each of our elementary schools. I set out to build a Space in my elementary school about three months ago and it’s been an interesting ride. The best part has been watching the excitement and curiosity of students in and around the space. I’m far from being an expert (did I mention that it’s been three months?) but I’ll share what I’ve done with the hopes that it could be helpful. This post is going to focus on the physical space.
The Physical Space
Very few actually have a choice about their space. Basically, you work with what you have. You actually don’t even need a space. +Gary Stager has talked about using large storage bins to organize tools so that the maker space could go to the classroom instead of the classroom coming to the space. For me, I was able to adapt a computer lab that is also a music room two days out of every six. I moved the computers to the perimeter of half the room and was able to find two large wooden tables to be workbenches in the center.
I was lucky to get discarded classroom furniture from Mr. Mike the custodian, including a number of shelving units.The room also has decent cabinets and a sink (big bonus.)
I’ve scrounged around for as much storage as possible but I’m already running out of places to put things. Work space is also tight. The tables in the center are great, but some unused countertop would be nice. My big takeaways: get as much storage and counter space as you can.
The Maker Library
I’ve got a growing library to inspire teachers and students alike. Some books, like the Make Component Encyclopedia and Make: Electronics are used during sessions. This is placed near the soldering station to identify components. Others are meant as idea references. I was able to get my hands on an old Make magazine collection and have subscribed for future issues. So far I’ve picked up the following books:
The Tools
As you can tell by the library, I decided to lean towards an electronics/robotics space. I invested in several Make:it - Soldering Starter Kits and a bunch of breadboards and multimeters. Radio Shack had a killer deal on Panavise Circuit Board vises so I was able to get two of those. I have a variety of standard tools, hammers, screwdrivers, pliers, power drill and bits. I also have a number of clamps, measuring tapes, combination squares, and a vise. The most intense piece of equipment in my shop is a MakerBot Replicator 5th Generation 3D Printer. It’s new and I don’t have a lot of experience with it, but I’m excited to start printing robot chassis!
What is Going On Right Now
My maker club has several projects in the works. Students are designing a laptop cart to house the refurbished Linux MacBooks. They are un-making a broken laser printer and working on their soldering skills by desoldering components from it’s salvaged circuit boards. In between projects, students are creating some Paper Craft. It's been a whirlwind three months made possible by supportive parents and amazing kids. I’m looking forward to blogging more about these projects in the future.
If you're interested in elementary school Maker Spaces, come and join our School Maker Space community!
Subscribe to:
Posts (Atom)